Quick Guide: Depth of Field in Images
For most people, Depth of Field in images can be an easy thing to understand. But, for many it is difficult to grasp it along with other technical things to remember.
Depth of field or DoF can be very nice and no matter what you’re filming – royalty free stock photos, daily random images – it will look very professional. Now most of the best stock photos sites do tell about the virtues of DoF, but they hardly ever explain the concept.
And, if you are one of the many, to whom this concept confuses, then this quick guide will help you. So, let’s cut to the chase with this Quick Guide about Depth of Field in Images.
Defining the DoF
The process in detail can be seen in Michael Langford in his book, ‘’Basic Photography: The Guide for Serious Photographer’’, however we will just interpret it as simply as possible.
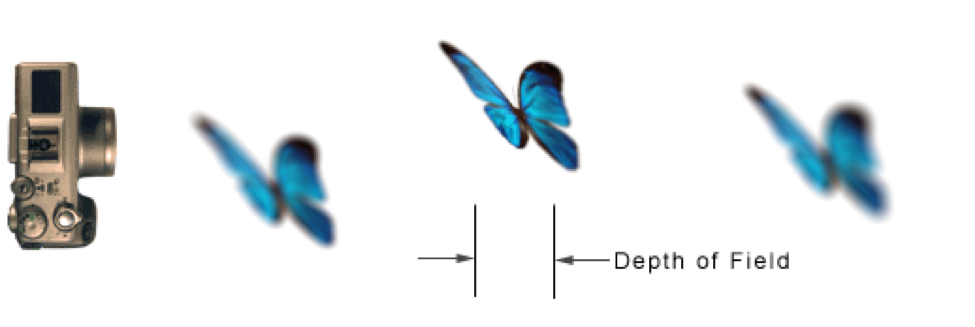
- First of all, technically speaking, ‘’the area or zone in apparent focus, before and after the point of actual focus is known as Depth of Field in photography’’
- DoF is a camera lens attribute that directs the viewer to the focus of the composition. DoF indicates how much of the scene is in focus.
- Within the area, blur (or unsharpness of image) will be negligible and everything can be accepted as in sharp focus.
There are two types of Depth of Field
- Shallow
- Wide or Deep
The two images for wallpaper shown below are examples of these two types:

Shallow DoF: The tree in the middle is in sharp focus while the foreground and background are not

Wide DoF: Everything is in focus in this landscape
Depth of Field in Images depends on 3 Factors

- Focal length of the lens –
- In simple terms, the focal length is the measure of how ‘’zoomed in’’ your lens is. It is available in mm and all lenses show the number right on the lens.
- Also, the longer the focal length of your lens the less DoF it gives, even with the same aperture and subject distance.
- Lens-to-subject distance –
Notice the wide dof in the image on the left and the shallow dof on the right
- It becomes less when you are shooting close-ups and greater when your subject is farther away.
- Doubling the distance to the subject approximately quadruples the DoF. (You can easily notice in the free high resolution images)
- Aperture –
In photography, aperture, also known as ‘’f-stops’’, refers to the physical size of the hole in your lens. That allows you to control the amount of light coming in your camera. F-stops are available as numbers on your camera.
1.4, 2.8, 4, 5.6, 8, 11, 16, 22, 32
- The smaller the number the greater the opening and greater the depth of field. The larger the number the smaller the opening and depth of field will be less.
- Therefore, more elements in your scene will be sharp and not just the thing you’re focusing on.
- Shooting at a smaller aperture makes a lot of sense for landscape photography (as seen in royalty free stock photos) where you want everything in the scene to be sharp.

What do you need?
Now, although you may have come across some information regarding the apt settings on social networking sites India, however now we arrive at the part where some technical things would be good to remember.
To increase your Depth of Field in images or make more of your image in focus, do the following:
- Use a smaller aperture (higher f-number) eg. f/16 or f/22
- Get a wide angle lens. eg. 14mm or 24mm (Remember the lesser the number here, the more the angle of view will be)
- Have your subject further away from your camera.
To have a shallow (small f-number) Depth of Field:
- Use a large aperture such as f/1.4 or f/2.8
- Get a zoom lens with settings at 80mm or 200mm
- Have your subject closer to the lens.

Conclusion
Not every shot has to be in a low focal area so you should not use Depth of Field in every shot.
Understanding it is especially relevant for quality images. You need to understand how to guide the viewer to that place in the picture that you want them to look. Go and visit some of the best stock photo sites to observe closely the usage of camera settings.


Comments
Post a Comment